Sunday, December 22, 2013

Glove controlled 3d printed robot hand with Arduino.


The 3D printed hand has been going around the 'net lately, many people have been adding servos to make the fingers move.  Dschurman put up an instructable that takes the robot hand the next level.


The design of the hand comes from a project called inmoov.  It can be found here http://inmoov.blogspot.com.  The plastic parts for the hand are open source and are available to download from the website.

The goal of inmoov is to build parts for life-sized humanoid robots, an interesting project in itself!  If you have  a 3D printer or and excuse to buy one, check it out!

Anyway, dschurman decided that he would like to update the design so that the fingers on the plastic hand can be controlled via your fingers in a glove.  To accomplish this, the instructable shows you how to attach resistive flex sensors to a glove.  An Arduino Uno reads the signals from the glove and controls the 5 servos that are used to manipulate the robot hand.   Arduino code is provided.


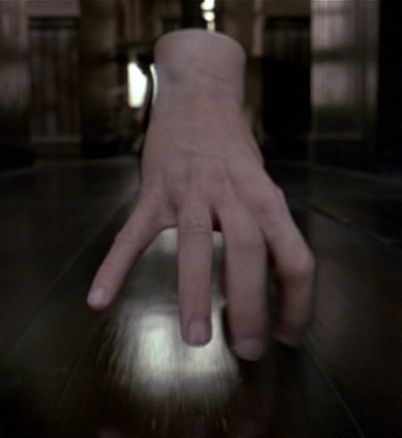
I really want to see someone make "Thing" from the Adams family.  Having this thing run around the house on Halloween would be sweet!

Dschurman estimates the project costs about $100-$150 in parts (as long as you have access to a 3d printer, otherwise this project may get a lot more expensive :) ).
Check out the video!
http://www.instructables.com/id/DIY-Robotic-Hand-Controlled-by-a-Glove-and-Arduino/

Regardless of the coolness factor, $150 for a prosthetic hand is a hell of a deal.  Its amazing what you can do with a little programming and a 3d printer.  You would think that this project is very close to be modified to allow someone to control it who has lost his/her hand.  I can't help but to think of the scene in Star Wars where Luke is getting a prosthetic hand after his battle with Darth Vader!

Friday, December 20, 2013

The Yún is an Arduino Powerhouse


When I think Arduino, I usually think small AVR base micro developing board.  When I saw the specs for the Yún, I thought holly crap, this is a PC with an Arduino soldered to it.  The Yùn is a hybrid system consisting of a large, powerful 400mhz CPU running Linux, and a Arduino Leonardo (running your sketches).  You basically get the best of both worlds.  

The Linux portion of the system is based on a  MIPS Atheros AR 9331 running at 400MHz.  This CPU is connected to 64Mb of DDR2 RAM and 16Mb of onboard flash.  Also connected is an wired Ethernet port (100Mb), Wifi (802.11b/g/n), USB host port and micro SD card slot.  The Linux CPU runs a version of Linux called OpenWRT.  The Arduino code communicates with the Linux CPU with a "Bridge API".  You can even write your own shell and python scripts. 

The Arduino side of things has its own micro USB port to upload the sketches.  The micro is a ATMega32u4 (basically a Leonardo, but some of the IO is used for the Bridge API).  If you are used to high level programming, you can roll your own Linux distro and I bet you can even run your own apps.

The Bridge API allows you to access:

  • The command line console.
  • The file system (reads and writes to the SD card or connected USB drive).
  • Allows you to do HTTP requests.
  • Allows you to run a server.
  • You can spawn processes.
  • Much More!

This would be a cool option to use for home automation or maybe even some sort of web based monitoring tool.

Check out the Arduino web page:
http://arduino.cc/en/Main/ArduinoBoardYun

This board is usually around $72-$80 and is sold at multiple sites.
SeeedStudio for example:
http://www.seeedstudio.com/depot/arduino-yÚn-p-1616.html?cPath=6_7

Thursday, December 19, 2013

Controlling A Print Head With An Arduino and InkShield!

Over the past couple of years, every now and then I see someone who has figured out how to control the little piezo electric print heads on print cartridges.  This technology is pretty interesting.  Basically, certain types of inkjet printer cartridges have the nozzles built right into the plastic housing of the cartridge.  The main bulk of the printer is dedicated to moving the cartridge around.  Something along the lines of 18V applied to the right pins, cause little droplets of ink to shoot out.  If done with the right timing, an image appears.


NicholasCLewis has created a product called the InkShield.  This Arduino compatible board can control an HP C6602 type inkjet cartridge.  Just start the code up and wave the inkjet cartridge over some paper (or something else) and viola, your design is printed onto the object!  The InkShield has circuitry on board to convert the 9-12V input to the 18.2 volts needed to run the cartridge.  No wonder these things are so expensive!


Here is the kickstarter, check out the video.
http://www.kickstarter.com/projects/nicholasclewis/inkshield-an-open-source-inkjet-shield-for-arduino

 The author over at SpritesMods.com has also put up a project entitled "Electronic Stamp".  The concept here is along the same lines, but the resulting machine is more like a magic fairy-wand-printer.

Here is the link
http://spritesmods.com/?art=inker&page=2


This project gets into the nitty-gritty of the technical issues surrounding how to control an HP print head.  Since the above page is not meant to sell a product, the author provides lots of information and a circuit diagram.  They can even print onto the foam on top of a beer!


Wednesday, December 18, 2013

Convert an RC car to Arduino Robot Platform

Randofo over at Instructables posted quite a writeup on converting a RadioShack RC car to Arduino robot.  In fact, it looks like you can acquire all the parts at your local RadioShack.

This main guts of the project are based on an Arduino Uno and a Arduino motor shield.  Randofo removes the stock innards and wires the motors to the motor shield.  This particular truck has a single rear drive motor and one steering motor.  I would think that just about any cheap RC car would work.  The explanation is pretty light, but I think the ultrasonic transducers are for object avoidance.

The project is well documented with step-by-step pictures.  I especially like the build quality.  The whole unit looks like it would be pretty solid.  The entire unit is powered by an off the shelf 9V battery.  The only upgrade I would suggest would be a better battery pack.  I would imagine that those motors would drain that 9V battery in no time.   A rechargeable would be great, maybe the Lithium Polymer shield?  And I bet you could charge it with the 5V USB connection.

This project would be a great starting point to learn motor control and ultrasonic transducers!  Arduino code is provided.


Check it out!
http://www.instructables.com/id/RC-Car-to-Robot/

Wednesday, December 11, 2013

Create your own video game system with Gameduino!


Ever want to make your own handheld video game system, but the thought of learning linear algebra make you break out into a cold sweat?  Have no fear!  The Gameduino (2) is here!  This cool board has an integrated FT800 graphics engine for controlling the display and running the audio output.  Some of the demos are only a few handfuls of lines of code, you could literally get started in a few minutes of copying and pasting.

The Gameduino features the following hardware.
- Arduino shield form factor
- 4.3" color display
- touch controls (resistive)
- Accelerometer
- SD card for storing game resources (graphics, sounds)
- Audio amplifier
- FT800 Graphics processor.


The demos look silky smooth and polished.


Even if you weren't using this for a gaming system, it would work well to host a very nicely polished UI for your projects.  Maybe even something to hang on the wall for home automation?  Plus all the complexity of controlling an LCD display and touch interface are handled for you.

Available at seeedstudio for $59
http://www.seeedstudio.com/depot/gameduino-2-p-1676.html

Check out the demo projects!
http://excamera.com/sphinx/gameduino2/

The kickstarter has launched!
http://www.kickstarter.com/projects/2084212109/gameduino-2-this-time-its-personal

Simple self balancing Arduino robot


This super simple balancing robot project looks pretty easy to build.  It uses an accelerometer to provide motor data.  An Arduino Uno controls it all.  If your like me, I bet you could salvage most of the parts from the old bottomless closet.

It looks like there is plenty of room for improvement, maybe a wireless remote or some sensors to provide information to the Arduino about how to control the robot.  But overall, this would be a good platform to get started in self balancing robots, motor control and accelerometers.  Code for the Arduino is provided!


http://www.instructables.com/id/Self-Balancing-Segway-Instructabot/

Tuesday, December 10, 2013

Low resolution animations with Rainbowduino, Looks 3D!


When I saw this project on Instructables, my jaw dropped.  This project produces some amazing 3d looking effects with just a Rainbowduino and a 8X8 RGB LED matrix.  The light is diffused with some tracing paper.  This would be something cool to hang up in the office.  It looks like the hardest part is getting the hole cut in the top of the box.  I bet a laser cut hole would be nice.  The author (giladaya) even provides some code and patterns to get started.

I really like the animation that kinda looks like a spinning galaxy.

The video is mesmerizing!


Check it out!
http://www.instructables.com/id/Low-resolution-display-done-right/

Monday, December 9, 2013

Strangely realistic Arduino controlled "cloud"


This pretty simple project has some pretty cool effects!  They use an Arduino, some RGB LEDs and polyfill stuffing to make a hanging cloud lamp.  The structure is held together with a transparent box that houses the Arduino and LEDS.  The polyfill is hot-glued to the outside.  It looks like the polyfill  channels and diffuses the light in some interesting ways.  You can even change the colors with a IR remote.

I bet you could make an awesome wig with the same method! Or maybe you can add Wifi and do some sort of weather indicator.

Check out the video!
http://www.instructables.com/id/IR-Remote-Controlled-Color-Changing-Cloud-Arduino/

There is also an updated version with some new features.
http://www.instructables.com/id/IR-Rainbow-Cloud-ver-1/

Teensy 3.1 ARM cortex M4 dev board

The Teensy line of development boards seem like some pretty powerful and compact (read teensy) microcontroller boards.  The latest version, Teensy 3.1 uses a Freescale 32bit ARM Cortex M4.  With 262K of flash, a whopping 64K of RAM, and running at 72Mhz, the Teensy 3.1 seems to be on the higher end of the horsepower range.  At under $20, I wouldn't mind giving it a try.

Loading code into the Teensy is accomplished via a boot loader, much like Arduino.  So, no JTAG/Debugger required.  Also, the website mentions that the Teensy boards are "mostly" compatible with Arduino sketches with the Teensyduino plugin to the Arduino IDE.

There are several USB examples for implementing various USB interfaces.  Keyboard, mouse, serial and HID are available.

The teensy 3.1 is $19.80 and is available here, check out the other Teensy boards.
http://www.pjrc.com/teensy/index.html

Sunday, December 8, 2013

Arduino Controlled LED shoes.


Here is yet another very interesting Arduino project.  I Am Jen over at instructables has created a pair of light up sneakers that have illumination patterns that can be changed by tapping your feet together.  This is a really interesting application of a magnet and reed switch.  Arduino code is included and all the steps look well photographed.  This project uses a RBBB Arduino, but I would think that just about any board will work.

Check out the video!

This would go great with some deadmau5 or Daft Punk!

Arduino Nano based Robot project for around $20.


PaulMakesThings has a pretty cool instructable on how to build a tiny Arduino Nano based robot.  This robot uses two modified 9g servos to provide propulsion.  There is a little bit of soldering and drilling, but should be manageable by just about anyone.  This would make a great (cheap) intro to Arduino and making things in general!

Basically, the Arduino nano provides a PWM signal to drive the servos in the direction requested, a small battery allows the device to run autonomously.  Paul has designed the project to allow the implementor to add sensors later on, allowing the platform to become as smart as you want it to be.  Add some IR sensors for line following or ultrasonics for object avoidance or maybe even an NRF24L01 to add wireless control.

I don't know about where you live, but around here you need some good projects to beat the winter blues.  This project would fit the bill.

http://www.instructables.com/id/Arduino-Nano-based-Microbot/

Friday, December 6, 2013

Crazyflie, the ARM quadrocopter dev kit!


 I like seeedstudio, they are creative, open source and geared towards tinkerers.  The Crazyflie is a great example if why this shop stands out.  It's a tiny (90mm square) quadrocopter.  And it's open source, in fact seeedstudio is counting on the community at large to develop it.  It's controlled via a 2.4ghz link and a PC.  And it can be wirelessly updated if you don't have a jtag debugger.  Based on a STM32 ARM cortex M3 running at 72 MHz, its got a lot of processing horsepower.  Check out the video!

Build your own swarm, I wonder if you could get a camera small enough for FPV.  This little guy can fly around 7 minutes on a charge, and can lift around 5-10 grams.

Starting around $116

Thursday, December 5, 2013

Bluetooth Multimeter

Seeedstudio has a slightly strange name, but they have lots of interesting gear.  This little device is a bluetooth multimeter.  It can measure voltage, current and resistance.  Its open source, so you can make your own custom projects with it!  SeeedStudio suggests a heart rate monitor,  I wonder if you could do some sort of brain wave monitor.

Looks like it is geared towards the Android platform right now, but I bet you could get it working on a laptop as well.  iPhone would be much harder, as this uses classic bluetooth.  Can measure up to 30Vdc.

$39 over at Seeedstudio

http://www.seeedstudio.com/depot/bluetooth-multimeter-p-1535.html?cPath=63

Tuesday, December 3, 2013

Wifi+Arduino+ARM = Spark Core


Here is yet another arduino that I am eager to try out.  This little guy packs a cc3000 wifi chip (100-300ft range), an stm32 ARM cortex M3 running at 72mhz, 128kb flash, 20kb ram and 2MB external flash, usb, uart a and more.  So lots of power and storage space, what more can a hacker ask for?   Looks like it's set up to run an embedded Web server.  It's also wirelessly programmable via the accompanying apps. The thing looks damn tiny as well.  

Bureaucracy of the future.


The future of drone deliveries....

Yet another wonderful use case.....

Engineering is 50% coffee, 20% doughnuts, 20% bagels and 10% sugar. 100% awesome.